2010年8月30日 星期一

轉貼 FileUpload google app engine java(图片上传实例demo)

google appengine 可以用來儲存相當多的資料,不同於文字,若要儲存圖片的話就比較麻煩一些


以下轉貼自 http://mimaiji.appspot.com/article?method=view&id=9001


程式碼簡單分成四個部份

1. 圖片物件 Photo.java


import javax.jdo.annotations.IdGeneratorStrategy;
import javax.jdo.annotations.IdentityType;
import javax.jdo.annotations.PersistenceCapable;
import javax.jdo.annotations.Persistent;
import javax.jdo.annotations.PrimaryKey;

import com.google.appengine.api.datastore.Blob;


@PersistenceCapable(identityType = IdentityType.APPLICATION,detachable="true")
public class Photo {

@PrimaryKey
@Persistent(valueStrategy = IdGeneratorStrategy.IDENTITY)
private Long id;

@SuppressWarnings("unused")
@Persistent
private String photoID;


@SuppressWarnings("unused")
@Persistent
private Blob photoO;


public Photo(Blob ObjBlob)
{
this.photoO = ObjBlob;
}


public Blob getPhoto() {
return this.photoO;
}

public Long getId() {
return this.id;
}


}


2. 資料存取物件 PhotoDao.java


import java.util.List;

import javax.jdo.PersistenceManager;
import javax.jdo.Query;

public class PhotoDao {
private static PhotoDao _instance = null;

public static PhotoDao getInstance() {
if (_instance == null) {
_instance = new PhotoDao();
}
return _instance;
}

public String insertPhoto(Photo photo) {
PersistenceManager pm = PMF.get().getPersistenceManager();
try {
pm.makePersistent(photo);
} finally {
pm.close();
}
return photo.getId().toString();
}


public Photo getById(Long id) {
PersistenceManager pm = PMF.get().getPersistenceManager();
Query query = pm.newQuery(Photo.class);
query.setFilter("id == idParam");
query.declareParameters("Long idParam");
List photo = null;
try {
photo = (List) query.execute(id);
if (photo.isEmpty()){
return null;
}else{
return (Photo) photo.get(0);
}

} finally {
query.closeAll();
}
}
}


3. PhotoServlet.java, Servlet 的設定,
3-1.這個例子要 import Apache 的 "
commons-fileupload" 和 "commons-io"
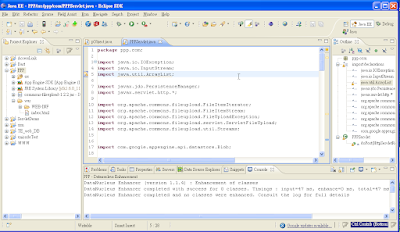
3-2. 下載完解壓縮, eciplse 專案中 加入 external jar, 如圖


3-3. 兩個 jar 要放在 \war\lib 中

3-4. code


import java.io.IOException;
import java.io.InputStream;

import javax.servlet.ServletException;
import javax.servlet.http.HttpServlet;
import javax.servlet.http.HttpServletRequest;
import javax.servlet.http.HttpServletResponse;

import org.apache.commons.fileupload.FileItemIterator;
import org.apache.commons.fileupload.FileItemStream;
import org.apache.commons.fileupload.FileUploadException;
import org.apache.commons.fileupload.servlet.ServletFileUpload;
import org.apache.commons.io.IOUtils;

import com.google.appengine.api.datastore.Blob;

public class PhotoServlet extends HttpServlet{
/*display image*/
public void doGet(HttpServletRequest req, HttpServletResponse resp)
throws IOException {
String id = req.getParameter("id");
Photo photo = PhotoDao.getInstance().getById(Long.parseLong(id));
Blob b = photo.getPhoto();
resp.setContentType("image/jpeg;charset=utf-8");
resp.getOutputStream().write(b.getBytes());
resp.getOutputStream().close();
}
/*upload image and add to datastore*/
public void doPost(HttpServletRequest req, HttpServletResponse resp)
throws IOException, ServletException {
ServletFileUpload upload = new ServletFileUpload();
FileItemIterator iterator = null;
try {
iterator = upload.getItemIterator(req);
} catch (FileUploadException e) {
e.printStackTrace();
}
try {
while (iterator.hasNext()) {
FileItemStream item = iterator.next();
InputStream stream = item.openStream();
if (item.isFormField()) {
// Handle form field
} else {
Blob bImg = new Blob(IOUtils.toByteArray(stream));
Photo photo = new Photo(bImg);
String pid = PhotoDao.getInstance().insertPhoto(photo);
req.setAttribute("Pid", pid);
resp.getWriter().write("Success "+ photo.getId());
}

}
} catch (FileUploadException e) {
e.printStackTrace();
}

}

}


4. 在 web.xml 設定 servelt 的路徑


<servlet>
<servlet-name>PhotoServlet</servlet-name>
<servlet-class>ppp.com.PhotoServlet</servlet-class>
</servlet>
<servlet-mapping>
<servlet-name>PhotoServlet</servlet-name>
<url-pattern>/PhotoServlet</url-pattern>
</servlet-mapping>


附註: 要將資料抓到程式中的話
可以利用 HTTP GET 的方式,來取得圖片的 Stream


例如 C# 為例將資料存成 BitmapImage


private void GetHTTPRequest(string URL)
{
/// try send message to the web, if success show that the connect correct
try
{
/// Create the request obj
HttpWebRequest req = (HttpWebRequest)WebRequest.Create(URL);

/// Set values for the request back
req.Method = "GET";

BitmapImage Bi = new BitmapImage();

Bi.BeginInit();

/// Set Bi source from MemoryStream
Bi.StreamSource = req.GetResponse().GetResponseStream();

Bi.EndInit();

IMG.Source = Bi;

}

catch{
Console.WriteLine("Error");
}
}
WPF 教學網站心得摘要 lesson 25-28

看完 微軟所提供的教學影片 所紀錄下來的心得摘要

網址
http://msdn.microsoft.com/zh-tw/netframework/cc963622.aspx

# 25 3D 繪圖 #3 – 3D材質處理技巧

1. 材質設定的範例,例如漸層、圖片(Imagebrash)


2. 內建3D 模型介紹

a. Sphere3D ,圓球體

b. Cylinder3D,圓柱體

c. Cone3D 圓錐體


# 26 3D 繪圖 #4 – 攝影機運鏡技巧

1. Position,攝影機座標,三維位置,攝影機位置
2. LookDirection,看得方向 ,相對作標
3. Updirection,法向量,三維
4. FieldofView,觀景窗角度,有點像鏡頭遠近
5. FarPlaneDistance, 最遠可視距離,小->近
6. NearPlaneDistance, 最近可視距離


# 27 3D 繪圖 #5 – 那是什麼光? 3D 光源使用技巧

1. 光源類型
a. AmbientLight (環繞光源),環境光
b. DirectionLight(方向性光源),太陽光
c. PointLight (點光源),燭光
d. SpotLight (聚光燈光源),聚光燈,手電筒

2. 常用屬性
a. Position 光源
b. Color 顏色
c. Diretcion 方向(PointLight 沒有這個設定)

3. PointLight 特殊光的範圍
Range 可以設定光可以照到的距離

4. SpotLight 特殊光的範圍
a. InnerConeAngle
b. OuterConeAngle

5. 宣告兩個 ModelView3D 可以同時照兩種光


# 28 3D 繪圖 #6 – 神奇的 3D 動畫

1. 控制攝影機的角度動畫
操作 Viewport3D.camera.PerpectiveCamera
的 position

2. 直接控制 Viewport3D.Transform

範例是 rotation,要設在 定義茶壺的那個Viewport3D,
中的 AxisAngleRoation3D, 旋轉 x軸

3. 若有兩個以上的動畫設定,要使用Transform3DGroup

2010年8月24日 星期二

Eclipse 中文註解

在 Eclipse 中 寫程式的話, 若想是用 中文的註解 就會出現 MS950 ... 的 錯誤訊息。


以下是在 Ecpipse 3.4.2 的設定方法
1. 選擇專案


2. Edit-> SetEncoding


3. 設定格式 為 utf-8


可以參考

http://www.wretch.cc/blog/pon24/13729920

或 google 一下 eclipse ms950 就可以找到相關文章

2010年8月17日 星期二

Facebook api for C# 2 upload image

上一篇的sample 可能有點不太清楚, 經過我實際測試後用 WPF 寫出了一個簡單的例子


摘錄幾段必須的code

1. 加入 reference " Facebook.dll"
下載 http://facebooktoolkit.codeplex.com/releases/view/39727
網頁中的 SDK_Binaries.zip ,
解壓縮後就可以找到


2. DesktopSession 的宣告


_appKey = ""; /// appKey 由自己在facebook 中建立的AP 中取得
_sessionSecret=""; /// sessionSecret 由自己在facebook 中建立的AP 中取得


/// setting the session
session = new DesktopSession(_appKey, _sessionSecret,
null,
true,
new List() { Enums.ExtendedPermissions.read_stream, Enums.ExtendedPermissions.publish_stream });


3. login, 會自己跳出一個 facebook 的登入頁面,若有設定紀錄的話則不會出現填帳號密碼的畫面
, 成功的話 session 中的 UserId SessionKey 會填入值


session.Login();


4. 宣告 api 物件, 將登入訊息 session 傳入, 之後就可以利用 api 物件連結控制存取 facebook 的 資料


Api _api = new Api(session);


5. 範例 取得使用者名稱,取得使用者資訊 user , 這裡以 名稱為例


/// Get user information
user _user = _api.Users.GetInfo();

Console.WriteLine(_user.name);


6. 範例 上傳相片 , 這裡示範兩種方式

a. Upload

/// upload image (AlbumID 相本名稱 , caption 說明 , FileInfo 圖片檔案 )
_api.Photos.Upload("CatonTest", "Upload by Caton Test", _data);


b. UploadAsync
image type 詳細可以看 http://www.java2s.com/Open-Source/CSharp/Network-Clients/Facebook%20Developer%20Toolkit/Facebook/Rest/Photos.cs.htm
的 _mimeTypes


/// _photoRoot 檔案路徑 ex. C:\sample.bmp

/// Get image as byte array
byte[] _image = FileToByteArray(_photoRoot);

/// image type 這裡設image/gif 但我試過用 bmp 檔也可以成功上傳
/// UploadAsync(AlbumID 相本名稱 , caption 說明 , image as byte array, image type , callback function , state )
_api.Photos.UploadAsync("CatonTest", "Upload by Caton Test", _image, "image/gif", AsyncDemoCompleted, null);


UploadAsync 的 callback function

private static void AsyncDemoCompleted(photo photo, Object state, FacebookException e)
{
var actual = photo;
Console.WriteLine("upload async OK~~~~! ");
}


7. 附註

建立相簿的功能可以用 function :
_api.Photos.CreateAlbum

不過目前測試取得相簿清單的函式都會失敗, 清單都是0筆


IList albums = _api.Photos.GetAlbums();

2010年8月16日 星期一

Facebook api for C#

FaceBook 提供了 API 給不同的 程式開發、這裡就來介紹一下 C# WPF 的一些心得


首先要 到這個網站 download API 所需要的檔案

http://facebooktoolkit.codeplex.com/releases/view/39727

裡面有一個 Samples 的 zip 檔, download 下來就可以跑 DEMO 例子


-------------------------------------

在跑 Samples 的例子之前,必須要在 facebook 建立一個 application 並取得 API 金鑰

建立一個 application:
連到 facebook developer


建立新應用程式


取得相關訊息


接者可以打開 samp file 將 API 金鑰 替換即可

sample code 這個 sample 是 FBToolkit.Samples.WPF 的專案


public partial class MainWindow : Window
{
DesktopSession session;
public static BindingManager FacebookService { get; private set; }

public MainWindow()
{

///DesktopSession(string appKey, string sessionSecret, string sessionKey, bool isWPF, List permissions)


session = new DesktopSession(

appKey, null, null, true, new List() { Enums.ExtendedPermissions.read_stream, Enums.ExtendedPermissions.publish_stream });


session.Login();
Api api = new Api(session);

var friends = api.Friends.GetUserObjects();

var service = BindingManager.CreateInstance(session);

ServiceProvider.Initialize(service);

InitializeComponent();

}
}

2010年8月3日 星期二

心得 C# String += 與 StringBuilder().Append

在 C# 中 ,若是作文字相加的功能,在效率上

使用 StringBuilder 比 String 快得多